目录
Why Installing Ground Anchor Bolts Correctly Is Essential
Ground anchor bolts are more than just metal fasteners—they are critical for keeping structures firmly connected to their foundations. Especially in areas vulnerable to high winds, heavy loads, or seismic activity, properly installed ground anchor bolts can mean the difference between a stable building and catastrophic failure.
For property owners, builders, or anyone planning to work on a structural project, understanding how to install these bolts step by step is vital for safety, compliance, and durability.
Preparation: Getting Ready for Installation
Evaluating Your Project Requirements
Before you start, assess what your project needs. Ask yourself:
-
Is this a new build or a retrofit?
-
What environmental forces (wind, seismic, soil movement) will the structure face?
-
What is the load capacity required for the ground anchor bolts?
This evaluation determines the type and size of bolts you should use and helps you avoid costly errors later.
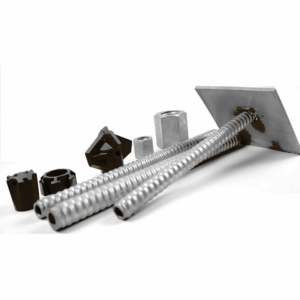
Selecting the Right Ground Anchor Bolts
The effectiveness of the installation depends heavily on the choice of bolts. Look for:
-
High-strength steel construction for durability.
-
Corrosion-resistant coatings if the bolts will be exposed to moisture.
-
The correct length and diameter as specified in structural plans.
Tools and Materials Checklist
To install ground anchor bolts, prepare:
-
Drill (for retrofitting projects)
-
Wrenches or torque wrenches
-
Level and measuring tape
-
Epoxy or grout (if using adhesive bolts)
-
Safety gear: gloves, goggles, hard hat
Step-by-Step Installation of Ground Anchor Bolts
Step 1: Mark Precise Anchor Points
Begin by marking where each bolt will be installed according to your project’s plans. Accuracy is critical here—misaligned bolts can create structural stress and require rework.
Step 2: Drill or Place the Bolts
For New Construction
If you’re working on a new build, place the bolts in position during the concrete pour. They must be set to the correct depth and remain aligned until the concrete cures.
For Retrofitting Existing Structures
For existing foundations, drill holes using a hammer drill to the specified depth. Clean out dust and debris thoroughly before placing bolts.
Step 3: Insert and Secure Bolts
Depending on the type of anchor:
-
Expansion bolts: Insert into the hole and tighten until they grip firmly.
-
Epoxy anchors: Fill the drilled hole with epoxy, insert the bolt, and allow curing as per manufacturer guidelines.
Use a torque wrench to tighten bolts to the specified level without over-torquing, which can damage threads or surrounding material.
Step 4: Check Alignment and Embedment
Use a level and measuring tape to confirm that all bolts are straight and at the correct depth. Adjust before the concrete sets or epoxy cures.
Step 5: Final Inspection
After curing, perform a visual inspection for signs of cracking or shifting. Verify that each bolt is firmly anchored and ready to bear the intended loads.
Best Practices to Ensure a Successful Installation
To achieve a durable and safe installation:
-
Always follow manufacturer specifications for depth, torque, and curing times.
-
Avoid installing in poor weather conditions, which can compromise epoxy curing or concrete setting.
-
Conduct regular site inspections during the installation process to catch errors early.
Common Installation Errors and How to Avoid Them
1. Improper Embedment Depth
Failing to install bolts deep enough can result in poor holding capacity. Always measure and drill to the correct depth specified for your bolts.
2. Over-Tightening Bolts
Excessive torque can strip threads or cause cracking in concrete. Use a calibrated torque wrench to achieve precise tightening.
3. Neglecting Site Preparation
Dirty or uneven surfaces can lead to weak bonding, especially for epoxy anchors. Clean and prepare all surfaces meticulously.
Post-Installation Maintenance of Ground Anchor Bolts
Even after proper installation, ongoing care is necessary:
-
Regularly check for corrosion or loosening, especially in high-humidity areas.
-
Retighten bolts if needed in structures exposed to vibration or seismic activity.
-
Apply protective coatings as an additional safeguard against environmental damage.
Why High-Quality Ground Anchor Bolts Are Worth the Investment
Cutting corners with cheap or unsuitable bolts can lead to devastating consequences. High-quality ground anchor bolts offer:
-
Greater resistance to environmental stressors.
-
Longer service life with minimal maintenance.
-
Assurance that your structure meets or exceeds safety standards.
Conclusion: Secure Your Build With Expert Anchor Bolt Installation
Proper installation of ground anchor bolts is a critical step in ensuring the safety and longevity of any structure. By following a clear, professional process and avoiding common mistakes, you can achieve a secure foundation that withstands both time and nature’s forces.
Whether you’re managing a residential project or a larger commercial build, investing the effort to do this right protects your property, your investment, and the people who depend on that structure every day.
0