
目录
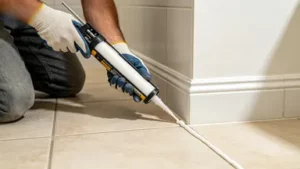
A proper technique when applying caulking gun will go a long way in determining whether the job will come out professionally. In sealing bathtubs, windows, countertops, baseboards, or construction seams, the aim is to get a continuous line of beads of uniform thickness and good adherence. Unstable pressure, large nozzle opening, and poor surface preparation will cause messy lines, gaps, and waste a lot of the material.
Many factors determine the quality of a caulking job, such as the type of sealant, the design of the gun, nozzle diameter, the speed of application, and the method of finishing. Although most of the minor tasks inside the house are not complicated and require not much preparation, it will go a long way in saving time and ensuring that the work is done right by simply preparing for a few minutes before you start. Below are some of the steps involved in the application of the sealant using the caulking gun.
What Do You Need to Use a Caulking Gun?
Choose the Right Caulk
It is important to note that the sealant used must match the surface and surrounding environment. Acrylic Latex Caulk is widely used in the joints within the interior and where painting is to be done, while silicone sealants are widely used in bathroom and kitchen joints.
Consider the following factors before selecting a product:
| Factor | What to Consider |
| Surface | Wood, glass, metal, tile, concrete, etc. |
| Moisture | Dry or wet environment |
| Flexibility | Rigid or movement-prone joint |
| Paintability | Required or not required |
| Cure time | Based on project schedule |
Select a Suitable Caulking Gun
The caulking gun that is selected must have sufficient control to ensure that the sealant is discharged from the cartridge in adequate amounts. Manual caulking guns are sufficient for many household uses, while high-thrust or powered ones may also come in handy when handling thick sealants. A smooth plunger system will ensure that you apply even pressure. The use of a drip-control feature will help minimize dripping when the trigger is released.
Prepare the Necessary Tools
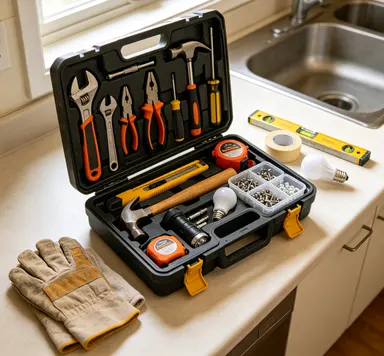
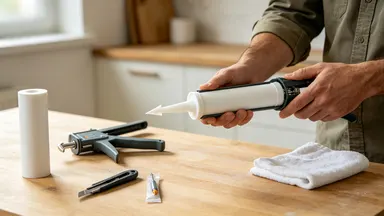
All tools must be prepared in advance to allow continuous operation of the application process. Useful items include:
- Caulk cartridge
- Utility knife or nozzle cutter
- Puncture tool
- Painter’s tape
- Damp cloth
- Finishing tool or suitable smoothing tool
- Cleaning solution appropriate for the sealant
How Do You Prepare a Caulking Gun Before Use?
Load the Caulk Cartridge
First, pull back the plunger rod and place the cartridge into the frame of the caulking gun. The cartridge should be mounted in a way that the nozzle faces forward. Remove the rod so that the plunger touches the bottom of the cartridge. This is to ensure that the cartridge does not slip under pressure.
Cut the Nozzle at the Correct Angle
Cut the nozzle according to the width of bead required for the joint. A smaller opening generally provides better control for narrow seams, while a larger opening allows more material to be applied to wider joints. The 45-degree angle is preferred because it will enable you to run the nozzle along the joint without losing contact. Make small openings and then enlarge as necessary rather than removing too much material initially.
Puncture the Inner Seal
Many cartridges contain an inner foil seal that must be opened before the sealant can flow. Use the puncture tool built into the gun, a long nail, or another suitable tool to break the seal. Insert the tool properly and ensure the passage inside the sealant is opened up. If the seal is not completely punctured, you will need to apply more force to the trigger, and you will have the seal will come out irregularly.
Set the Application Pressure
Different sealants require different levels of force. Before working on the actual joint, apply a short bead onto scrap material or cardboard. This allows you to determine how much trigger pressure is needed. You aim to create a regulated flow of material instead of forcing it out at once. In case you find the sealant extremely thick, you can go for the high-thrust gun, which might work better.
How Do You Use a Caulking Gun for a Clean Finish?
Apply Consistent Pressure
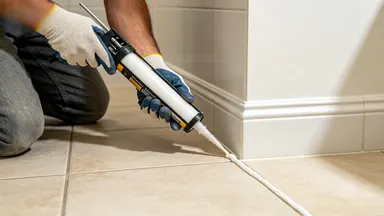
Ensure that the gun is positioned about 45 degrees to the joint,t with the nozzle being very close to the surface. Apply force on the trigger gradually and not abruptly. Consistent force ensures that the sealant comes out at a consistent pace and you do not end up with thin areas or thick globules on the joint.
It is better if you use both hands whenever possible, with one holding the trigger while the other holds the gun. In case the bead becomes suddenly thick, reduce the force on the trigger or increase the speed a bit.
Maintain a Steady Bead
Position the nozzle at the beginning and pull the gun steadily along the joint. If the joint permits, try to keep the nozzle in contact with the surface to facilitate better flow of the sealant into the seam as opposed to staying on the surface.
The bead must be large enough to cover the joint without excessive build-up. Where the joint is narrow, as found in households, the bead may be about 3–6 mm. However, the size of the bead must depend on the size of the joint as well as the requirements for the sealant.
Control the Application Speed
Your movement speed should match the sealant flow rate. Moving too quickly can produce a thin bead or leave small gaps, while moving too slowly can create excessive buildup that requires more finishing work.
A practical starting speed for beginners is approximately 300–600 mm per minute on small, accessible joints. This is only a reference range, so adjust your speed according to the sealant viscosity, nozzle opening, and joint size. If the bead becomes uneven, correct your hand movement gradually instead of repeatedly stopping the gun.
Smooth the Caulk Immediately
The second step in the process of applying the bead is smoothing it. Do not press the bead until it loses its pliability, as this will lead to uneven smoothing and a bad aesthetic effect. Apply the finishing technique with the help of the caulking finishing tool or any other means recommended by the manufacturer of the sealant. Move smoothly and evenly from one edge of the seam to the other, using gentle pressure and avoiding repetitive movements to avoid smudging the surface of the seam.
Conclusion
Using a caulking gun requires not only being able to apply a bead of sealant but also having the skills to prepare the sealant itself. Choosing the appropriate sealant, preparing the cartridge of the sealant, careful cutting of the nozzle, and control of the pressure and speed of movement all play a role in the final result. To make straight lines with caulk, pay attention to consistency during application. The proper nozzle, movement of the gun, and immediate smoothing can help you get a better result.
0